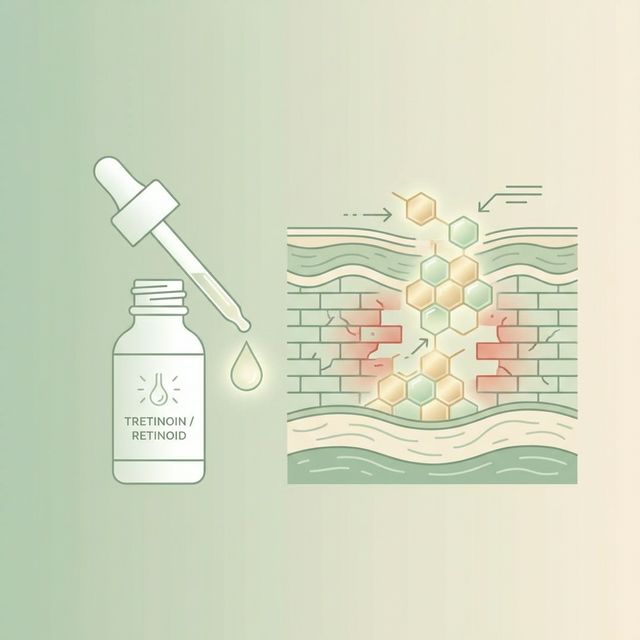
You’ve decided to treat your acne scars professionally. Now you’re stuck researching: subcision or microneedling? Both show up in every acne scar discussion, but knowing which to do—and in what order—makes a real difference in your results.
Short answer: For rolling or tethered scars, subcision usually comes first. Microneedling follows after to refine texture. Here’s why order matters and what to ask before you book.
At a Glance
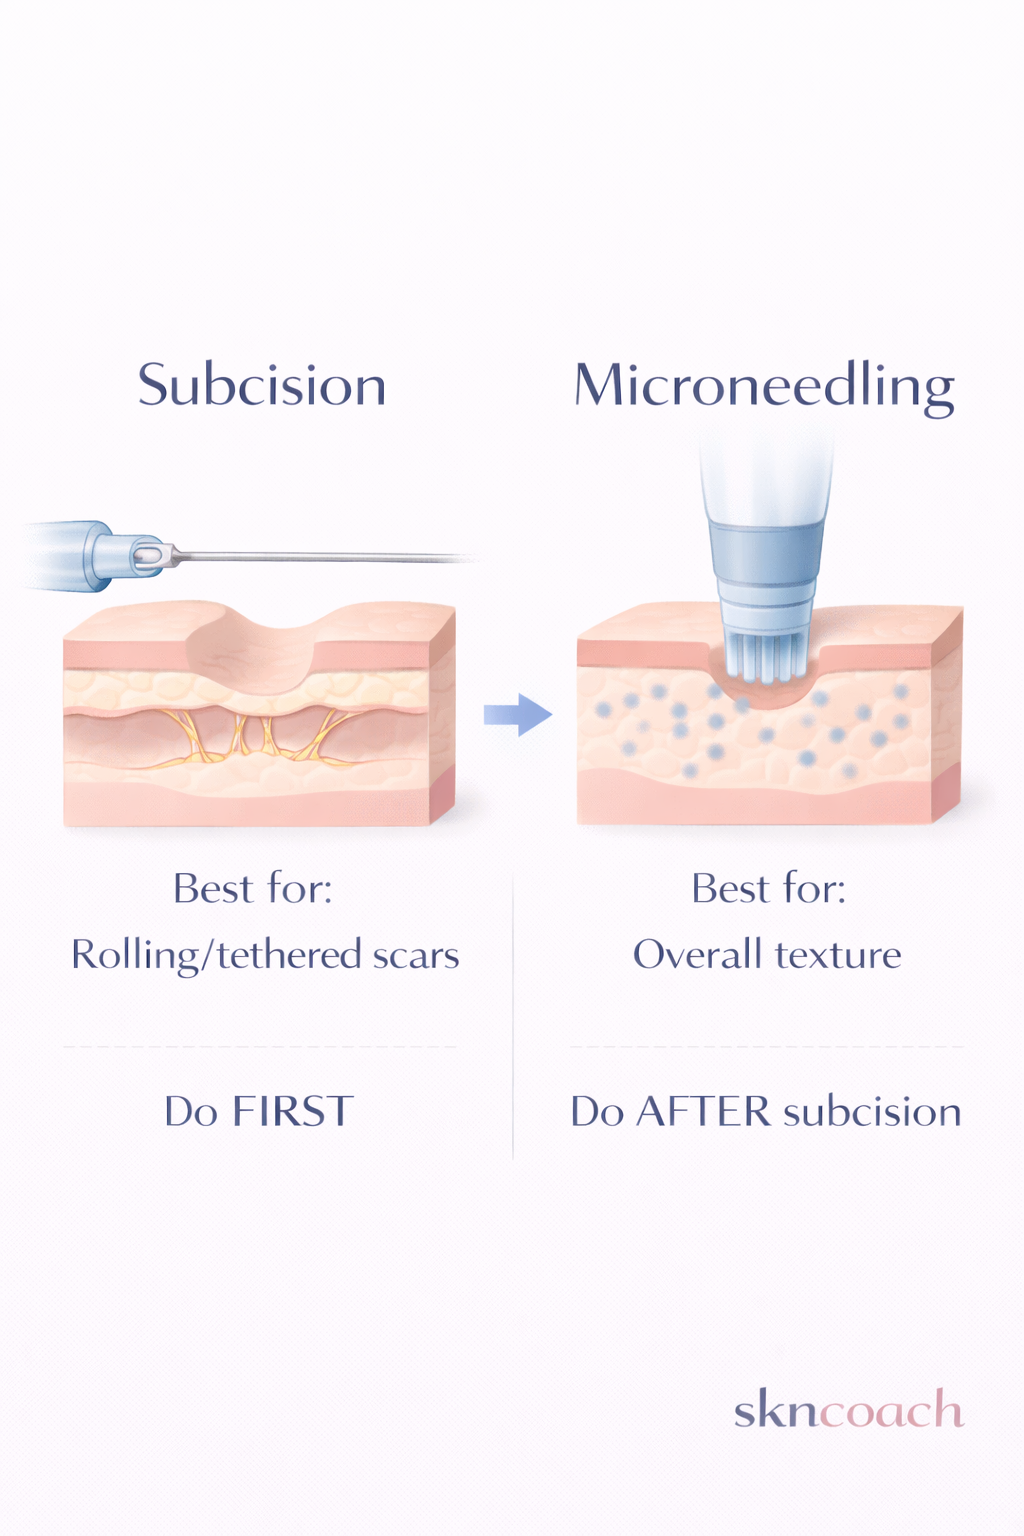
- Subcision: Cuts fibrous bands pulling scars down (for rolling/tethered scars)
- Microneedling: Refines texture (for overall improvement)
- Order matters: Subcision first → then microneedling
- Sessions: 2-4 subcision, 3-4 RF microneedling
- Key test: If scars flatten when you stretch skin = tethered = subcision first
What Each Treatment Does Best
Subcision
Best for: Rolling scars, tethered scars, scars that look worse when you stretch your skin
How it works: A needle or cannula is inserted under the skin to physically cut the fibrous bands (called “tethers”) that are pulling the scar down. Once the bands are released, the skin can lift and sit at a more normal level.
Key points:
- Directly addresses the cause of rolling scars (the tethering)
- Creates a pocket under the skin that can be filled by your body’s healing response
- May be combined with filler or PRP for additional volumization
- Requires multiple sessions (usually 2-4) for best results
Limitations:
- Doesn’t improve overall texture beyond the tethered areas
- Doesn’t help icepick scars (too narrow and deep)
- Causes bruising (sometimes significant) that takes 1-2 weeks to resolve
Microneedling
Best for: Overall texture improvement, shallow boxcar scars, general skin quality, maintaining results after other procedures
How it works: Tiny needles create controlled micro-injuries in the skin, triggering your body’s wound-healing response. This increases collagen and elastin production, improving skin texture over multiple sessions.
Key points:
- RF (radiofrequency) microneedling goes deeper and provides better results than standard microneedling
- Works on surface and mid-depth without addressing deep structural issues
- Less downtime than lasers
- Safer for darker skin tones than most laser options
Limitations:
- Won’t release tethered scars (the needle injuries alone don’t cut fibrous bands)
- Doesn’t go deep enough for icepick scars
- Requires 3-6+ sessions for visible results
Why Order Matters
If you have rolling scars with visible tethering and you do microneedling first, here’s what happens:
- The microneedling creates new collagen
- But the fibrous bands still pull the skin down
- New collagen forms around the tether, not releasing it
- Your scar may look slightly better in texture but isn’t lifted
The result: You’ve spent money and recovery time on a treatment that couldn’t address your main issue.
When you subcise first:
- The tethering is cut and released
- The skin can naturally lift
- Your body fills in the space beneath
- Then microneedling improves the texture of the now-lifted skin
The result: Each treatment builds on the last. Subcision creates structural change; microneedling refines the surface. Doing them in the right order maximizes your results.
The Smart Sequence
For most rolling/tethered scars:
- Subcision – 2-4 sessions, 6-8 weeks apart
- Wait 2-3 months – Let collagen remodeling happen
- RF Microneedling – 3-4 sessions, 4-6 weeks apart
- Maintenance – Annual microneedling to maintain results
If you have ONLY shallow texture issues and no tethering (stretch your skin—if scars don’t flatten or get shallower, there’s no tethering), you can start directly with microneedling.
How to Tell If Your Scars Are Tethered
The stretch test:
- Gently stretch the skin around your scars
- Watch what happens to the depressed areas
If the scars become shallower or flatten when stretched: They’re likely tethered. Subcision will help.
If the scars stay the same depth regardless of stretching: They’re not tethered. You may benefit more from microneedling, TCA CROSS (for icepick), or filler directly.
This isn’t a perfect test—a dermatologist can confirm—but it’s a good starting point.
Combination Approaches (Subcision + Filler/PRP)
Many practitioners combine subcision with additional treatments in the same session:
Subcision + Filler
After releasing the tether, hyaluronic acid filler (like Restylane or Juvederm) is injected into the space created.
Pros:
- Immediate visible lift (not just from swelling)
- Filler acts as a spacer, preventing retethering
- Can address volume loss in the area
Cons:
- Temporary (filler dissolves over 6-18 months)
- Added cost
- Possible lumps or asymmetry if not done carefully
Subcision + PRP
Platelet-rich plasma (your own blood, concentrated) is injected after subcision to enhance healing.
Pros:
- Uses your own growth factors
- May enhance collagen production
- No risk of filler migration or lumps
Cons:
- Less immediate visible result than filler
- Evidence is mixed on how much it adds
- Adds time and cost to the procedure
Subcision + Suction Protocol (Taylor Liberator / Cannula + Suction)
Some clinics use a suction protocol after subcision to encourage a seroma (fluid pocket) that promotes collagen filling.
Pros:
- May enhance long-term improvement
- Inexpensive add-on
Cons:
- Protocol varies by practitioner
- More aftercare required at home
What to Ask the Clinic Before Booking
Not all subcision is the same. Get clarity with these questions:
About the Procedure
-
What tool do you use—needle, Nokor, or cannula?
- Nokor needle: Sharp, effective, may cause more bruising
- Cannula: Blunt tip, less bruising, may not release tough tethers as effectively
- Some providers use both depending on the scar
-
How many release points per scar?
- More isn’t always better—it’s about thorough release
-
Do you use a fanning technique or linear?
- Fanning creates more complete release for wider rolling scars
-
Do you combine with filler, PRP, or suction?
- Know what’s included in the price
About Aftercare
-
What’s the expected bruising timeline?
- Plan for 1-2 weeks of visible bruising
-
Can I ice? How soon?
- Protocols vary
-
When can I sleep on my face again?
- Usually 3-5 days of sleeping elevated/on back
-
When can I wear makeup?
- Usually 24-48 hours post-procedure
About Results
-
How many sessions do you typically recommend for my scarring level?
- 2-4 is common; more isn’t necessarily better if tethers are released
-
What percentage improvement is realistic?
- Honest providers give a range (e.g., 40-60%), not guarantees
-
How long until I see results?
- Some lift immediately (plus swelling), full collagen remodeling at 3-6 months
What to Expect: Recovery Timeline
Day 0 (Treatment Day)
- Numbness from local anesthesia for 2-4 hours
- Swelling starts as numbness fades
- Possible bleeding at insertion points
Days 1-3
- Peak swelling (your scars may temporarily look better due to fluid)
- Bruising becomes visible
- Tenderness when touching the area
Days 4-7
- Swelling decreases
- Bruising turns from dark purple/blue to yellow-green
- Can usually return to work with makeup if needed
Days 7-14
- Bruising fades
- Most visible recovery is complete
- May still feel some firmness/lumps under skin (normal—they resolve)
Weeks 4-12
- Collagen remodeling continues
- You’ll see gradual improvement
- This is when you can assess whether another session is needed
When Subcision Won’t Help
When subcision won’t help: Icepick scars (too narrow—use TCA CROSS), boxcar scars without tethering (use microneedling/fillers), PIH/PIE marks (use topicals), or active cystic acne (get acne controlled first).
The Bottom Line
Subcision and microneedling are complementary, not competing. Subcision releases the bands pulling scars down; microneedling improves overall texture. For tethered scars, doing them in the right order—subcision first—maximizes your results.
If you’re ready to start treating your scars, see a board-certified dermatologist or provider experienced in acne scar revision. Ask the questions above, understand the process, and plan for multiple sessions over time.
For a complete guide to all scar types and treatments, see our pillar post: Acne Scars & Pits: What Works (Serums vs Procedures)
This content is for informational purposes only and does not replace professional medical advice. Consult a board-certified dermatologist for personalized treatment recommendations.