Icepick scars are the most frustrating type to treat. They’re narrow, deep, and stubborn—lasers and microneedling can’t reach them effectively. That’s where TCA CROSS comes in.
This precision technique uses high-concentration acid applied directly inside each scar to trigger collagen rebuilding from the bottom up. It’s one of the few treatments that genuinely improves icepick scars.
Here’s what you need to know before booking.
At a Glance
- Best for: Icepick scars, narrow boxcar scars
- Sessions needed: 3-6, spaced 4-6 weeks
- Expected improvement: 60-80% after full course
- Downtime: 1-2 weeks visible scabbing per session
- Key rule: Never DIY—professional treatment only
What Is TCA CROSS?
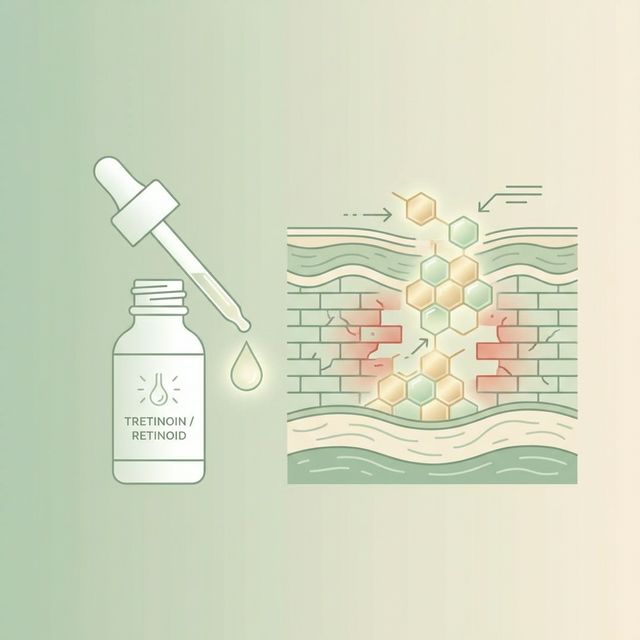
TCA CROSS stands for Chemical Reconstruction of Skin Scars. It uses trichloroacetic acid (TCA) at high concentrations (70-100%) applied precisely inside individual scars with a toothpick or fine applicator.
How it differs from TCA peels:
- Regular TCA peels use lower concentrations (10-35%) applied to the entire face
- TCA CROSS uses high concentrations in tiny, controlled doses inside each scar only
- The goal isn’t to peel your skin—it’s to cause controlled damage deep in the scar that triggers healing from below
What happens:
- Acid is deposited at the base of the icepick scar
- It destroys damaged tissue in the narrow column
- Your body responds by producing new collagen from the bottom up
- Over multiple sessions, the scar gradually rises to meet the surrounding skin
Which Scars Does TCA CROSS Work On?
Ideal candidates:
✓ True icepick scars – Narrow (1-2mm), deep, V-shaped
✓ Narrow boxcar scars – Small diameter, sharp edges
✓ Deep pits with defined edges – The applicator needs to fit inside
Less ideal or not suitable:
✗ Wide boxcar scars – Too broad to treat one at a time effectively
✗ Rolling scars – No defined edge to target; subcision is better
✗ Shallow texture – Microneedling or laser works better
✗ PIH/PIE (marks) – TCA CROSS doesn’t treat color, only structure
The Fingertip Test
Icepick scars look like someone poked your skin with a pin or needle. They’re narrower than most people think. If the depression is wide enough that you can see the bottom clearly, it’s probably a boxcar scar, not icepick.
True icepicks are so narrow that you can barely see down into them—they’re often darker because light doesn’t reach the bottom.
The Treatment Process
Before Treatment
- Consultation: Provider assesses scar types and counts treatable scars
- Photos: Baseline documentation (your provider should do this)
- Prep: Some providers prescribe tretinoin or hydroquinone 2-4 weeks before for darker skin tones (reduces PIH risk)
- Stop: Retinoids 3-7 days before (ask your provider)
During Treatment
- Face is cleansed and dried – No numbing needed (the procedure is quick)
- Scars are identified – Provider may circle or map them
- TCA applied – Using a wooden toothpick, fine needle applicator, or sharpened wooden stick, the provider deposits a tiny amount of TCA directly into each scar
- Frosting occurs – The acid causes an immediate white frosting in each treated scar
- Wait – Frosting resolves after a minute or two
- Done – Total treatment time is usually 15-30 minutes depending on how many scars
Pain level: Sharp stinging for a few seconds per scar. Most people describe it as uncomfortable but tolerable. It fades quickly. If you have many scars, you’ll feel the cumulative effect.
Immediately After
- White frosting in each treated scar
- Slight swelling around treatment areas
- Stinging fades within 30-60 minutes
- You can leave the office immediately
Aftercare + Downtime
TCA CROSS has visible downtime that you need to plan around.
Days 1-3: Frosting → Crusting
- The white frosting turns into small brown/dark scabs over each treated scar
- These scabs are darker than your skin—they’re visible
- Keep the area dry
- Don’t pick or scratch (this can cause scarring)
- Apply a light layer of occlusive ointment (like Vaseline or Aquaphor) if instructed
Days 4-7: Scabs Remain
- Scabs are still visible
- They may feel tight or itchy
- Continue to avoid picking
- Gentle cleansing around (not on) the treated areas
- No makeup directly on scabs
Days 7-14: Scabs Fall Off
- Scabs naturally separate
- Underneath, the skin may be pink or slightly depressed still
- This is normal—improvement comes over weeks and months
- Once scabs are gone, you can resume normal skincare and makeup
Weeks 2-8: Healing and Collagen Remodeling
- New collagen builds from the base of each scar
- You may notice scars gradually looking shallower
- Results are subtle at first—more noticeable after multiple sessions
- Protect the area from sun exposure
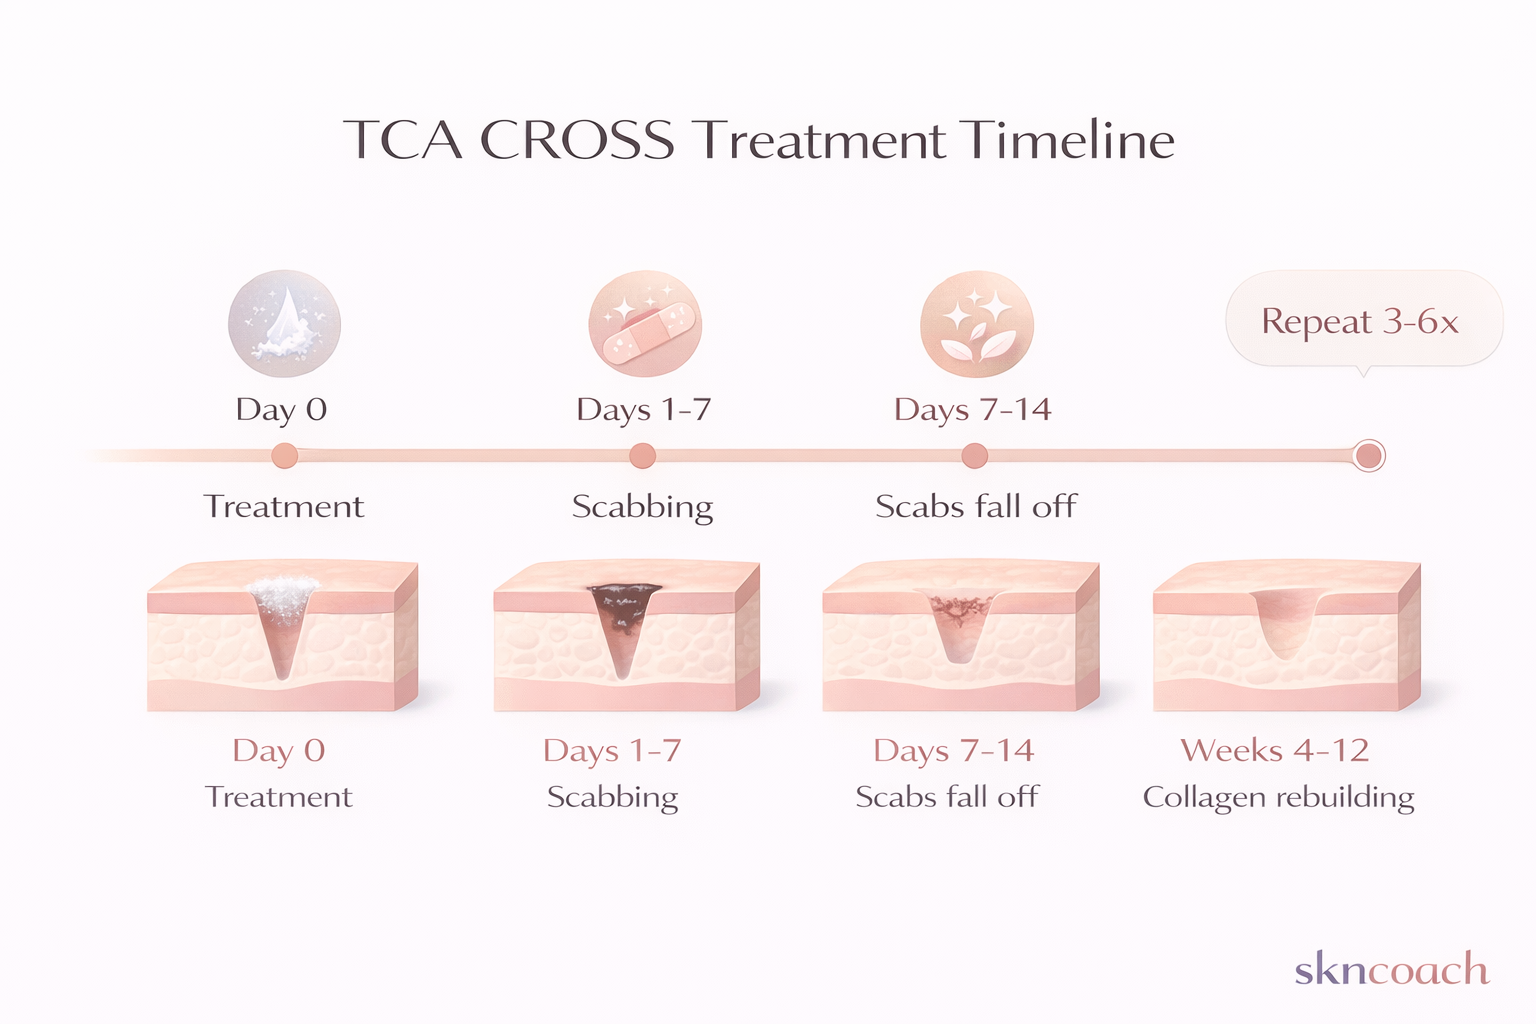
Full Timeline
| Phase | Duration | What’s Happening |
|---|---|---|
| Frosting | 0-24 hours | White marks in each scar |
| Scabbing | Days 1-7 | Small brown scabs form |
| Scab separation | Days 7-14 | Scabs fall off naturally |
| Remodeling | Weeks 4-12 | Collagen fills from below |
| Visible results | After 2-3 sessions | Progressive improvement |
How Many Sessions?
Most people need 3-6 sessions spaced 4-6 weeks apart for significant improvement.
Each session builds on the last:
- Session 1: Initial treatment, some filling
- Session 2: Continued improvement, re-treating remaining depth
- Session 3+: Refining until scars are as improved as possible
Improvement rate: Each session typically improves icepick scar appearance by 20-30%. After 4-6 sessions, many people see 60-80% overall improvement. Some deep icepicks won’t fully disappear but will become significantly shallower and less visible.
Risks and Side Effects
TCA CROSS is generally safe when performed correctly, but risks exist:
Common (Expected)
- Scabbing – This is supposed to happen
- Temporary redness – Normal healing
- Temporary hyperpigmentation – Especially in darker skin tones
Uncommon
- Prolonged hyperpigmentation – Usually resolves with topicals and time
- Spreading of TCA – If too much is applied, acid can affect surrounding skin
- Mild scarring worsening – Rare, from picking scabs or incorrect technique
Rare but Serious
- Widening of scars – If too much acid is applied or technique is poor
- Permanent hypopigmentation – Loss of pigment (more concerning in darker skin)
- Infection – If aftercare is neglected
How to Minimize Risk
- Choose an experienced provider (ask about their TCA CROSS experience specifically)
- Follow aftercare instructions exactly
- Do NOT pick at scabs
- Protect from sun exposure rigidly
- For darker skin: ensure pre-treatment prep and go slowly
Why You Should NEVER DIY TCA CROSS
Yes, you can buy TCA acid online. No, you should not attempt this at home. Here’s why:
1. Concentration Is Critical
TCA at 70-100% is caustic. A fraction too much spills onto normal skin, and you’ve created a burn and potentially a new scar. Professionals use precise applicators and have training in depth control.
2. Application Technique Matters
The angle, amount, and depth of application affect whether you get improvement or damage. Too much = acid penetrates too deep or spreads. Too little = no effect.
3. One Wrong Move ≠ Reversible
If you burn yourself with high-concentration TCA, you cannot undo it. The damage is done. You may create PIH, new scarring, or widened scars that are worse than what you started with.
4. You Can’t See What You’re Doing
Icepick scars are tiny. Applying acid with precision while looking in a mirror, without proper lighting or magnification, is nearly impossible.
5. The Cost Isn’t That Different
A TCA CROSS session is typically $150-400 depending on the number of scars. One session of professional treatment is worth far more than the risk of permanent damage from DIY.
TL;DR: This is NOT a home treatment. TCA at 70-100% is caustic—one wrong move creates burns and potentially new scars. A professional session costs $150-400, worth far more than the risk of permanent damage from DIY.
TCA CROSS vs. Other Icepick Treatments
TCA CROSS vs. Punch Excision
Punch excision physically removes the scar with a small circular tool (like a tiny cookie cutter), and the edges are sutured together or left to heal.
| Factor | TCA CROSS | Punch Excision |
|---|---|---|
| Invasiveness | Low (no cutting) | Higher (surgical) |
| Downtime | 1-2 weeks | 1-2 weeks |
| Best for | Most icepicks | Very deep or treatment-resistant icepicks |
| Sessions needed | 3-6 | Usually 1 |
| Risk | Low | Small linear scar from suture |
Punch excision is often used for icepicks that don’t respond to TCA CROSS or are unusually deep.
TCA CROSS vs. Microneedling
Microneedling needles don’t go deep enough or narrow enough to reach the base of icepick scars. Microneedling is for overall texture; TCA CROSS is for targeted deep scars. They can be combined (TCA CROSS first, then microneedling for overall texture).
TCA CROSS vs. Fractional Laser
Similar to microneedling, most fractional lasers don’t penetrate narrow and deep enough for true icepicks. Some ablative CO2 lasers can help, but TCA CROSS is often more effective and has less downtime.
Questions to Ask Before Treatment
-
How many TCA CROSS procedures have you done?
- Experience matters with precision techniques
-
What concentration do you use?
- 70-100% is standard; lower doesn’t work as well for deep scars
-
How do you apply it?
- Toothpick/wooden stick is common and precise
-
What’s your aftercare protocol?
- Should include clear written instructions
-
Do you recommend pre-treatment for my skin tone?
- Important for anyone with medium-dark skin (Fitzpatrick III-VI)
-
How many sessions do you anticipate for my scarring?
- 3-6 is typical; if they say 1 will “cure” it, be skeptical
The Bottom Line
TCA CROSS is one of the most effective treatments specifically for icepick scars. It’s precise, relatively affordable, and has a good safety profile when performed by an experienced provider.
Expect:
- 3-6 sessions for significant improvement
- 1-2 weeks of visible scabbing per session
- Gradual improvement over months
- Professional treatment only—never DIY
If you have a combination of scar types (which most people do), TCA CROSS targets the icepicks while other treatments handle rolling scars, boxcar scars, and overall texture.
For a complete guide to all scar types and the treatment sequence, see: Acne Scars & Pits: What Works (Serums vs Procedures)
This content is for informational purposes only and does not replace professional medical advice. Consult a board-certified dermatologist for personalized treatment recommendations.